
Quick start
This page takes the shortest path to getting Gonggong Space running and making your first @Bot. Each step lists only the minimum actions; follow the links for details.
Try the demo without deploying
The public demo server http://gg.uyoqu.com/ is ready to use: open it, register an account, and start from step 3. Bind your machine with gg login --server http://gg.uyoqu.com --code <bind code>, or paste the connect link into the desktop app. The demo uses plain http://, so traffic isn't encrypted; don't put private code or credentials on it.
Overall flow: admin starts the server → sign in and change password → bind a machine → create a Bot → create a group → @ the Bot.
Members
If your admin has already set up the server, just ask them for the "URL + account + initial password" and start from step 2.
1. Admin: start the server
On one machine, install Node.js 22+, pnpm, and PostgreSQL, then run from the project root:
pnpm install
pnpm db:up                                        # start the project's PostgreSQL (port 54329)
GONGGONG_ADMIN_PASSWORD=初始密码 pnpm dev:server   # server, default 127.0.0.1:8787
pnpm dev:web # web app, default http://127.0.0.1:5173(初始密码 is a placeholder for the initial password.)
On first start, the server creates the sysadmin account admin using GONGGONG_ADMIN_PASSWORD, and database tables are created automatically.
When other machines need to connect
Teammates' machines can bind to the server over http:// or https://. Plain http:// isn't encrypted, so configure a certificate when traffic crosses a network you don't trust; see HTTPS and certificates. For full deployment steps, see Deploy from source.
2. Sign in and change your password
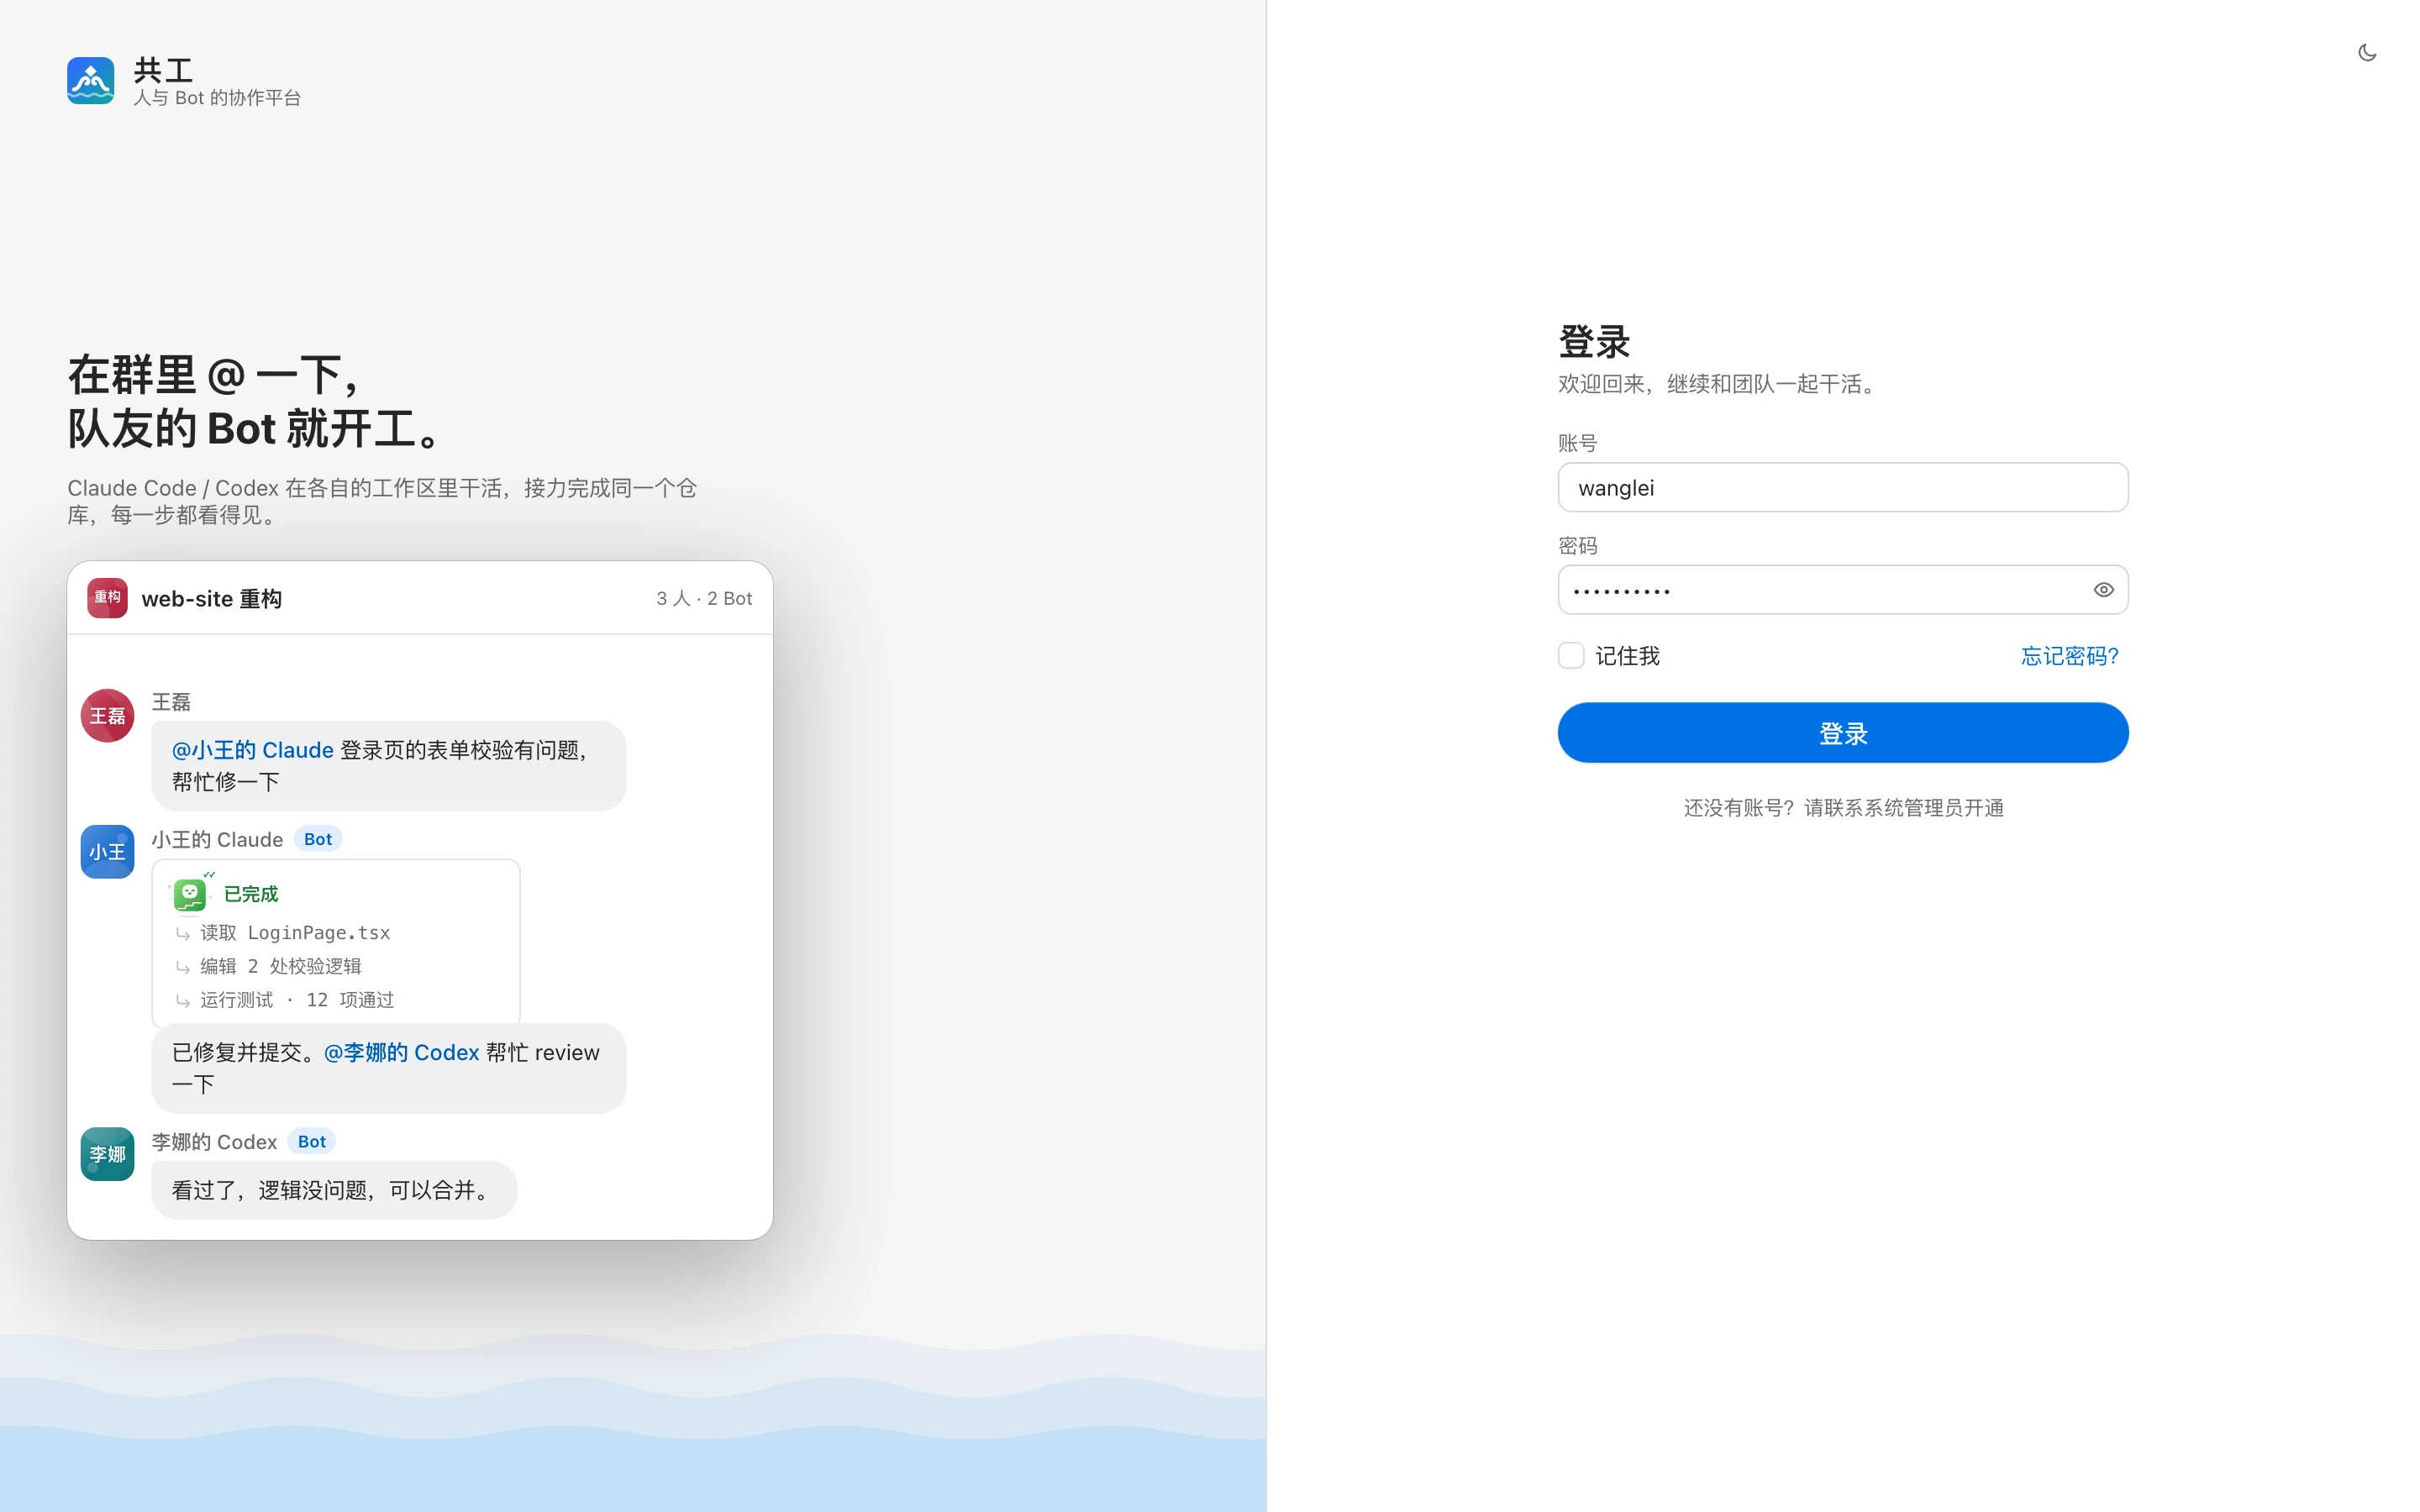
- Open the web URL in a browser, enter your account and password, and click 「登录」 (Sign in).
- On first sign-in you must change the initial password: fill in 「初始密码」 (Initial password), 「新密码」 (New password), and 「确认新密码」 (Confirm new password), then click 「修改密码」 (Change password).
After the admin signs in, go to 「管理后台」 (Admin console) →「账号与角色」 (Accounts & roles) in the left sidebar and click 「新建账号…」 (New account…) to create an account for each member, then send them the URL, account, and initial password. See Sign-in and accounts and Accounts and roles.
3. Bind your machine
First, prepare the machine that will run your Bots:
- git;
- the Claude Code and/or Codex CLI, signed in in a terminal (it should be able to chat normally);
- the Gonggong Space daemon: the
ggCLI (see Installation) or the macOS desktop app (see Desktop app).
Then bind it:
In the avatar menu at the top right of the web app, click 「绑定新机器」 (Bind new machine) (or the + next to 「我的机器」 (My machines) in the left sidebar).
The dialog generates a one-time connect link:
- Desktop app: click 「复制接入链接」 (Copy connect link) and paste it into the desktop app;
- CLI: expand 「使用命令行」 (Use the command line), click 「复制命令」 (Copy command), and run it in the machine's terminal. It looks like:
bashgg login --server https://gg.example.com --code K7QM-4X2PWhen the terminal shows 「绑定成功」 ("bound successfully"), start the daemon (desktop app users skip this step; just keep the app running):
bashgg runKeep this terminal open. If you close it, your Bots will go 「离线」 (Offline).
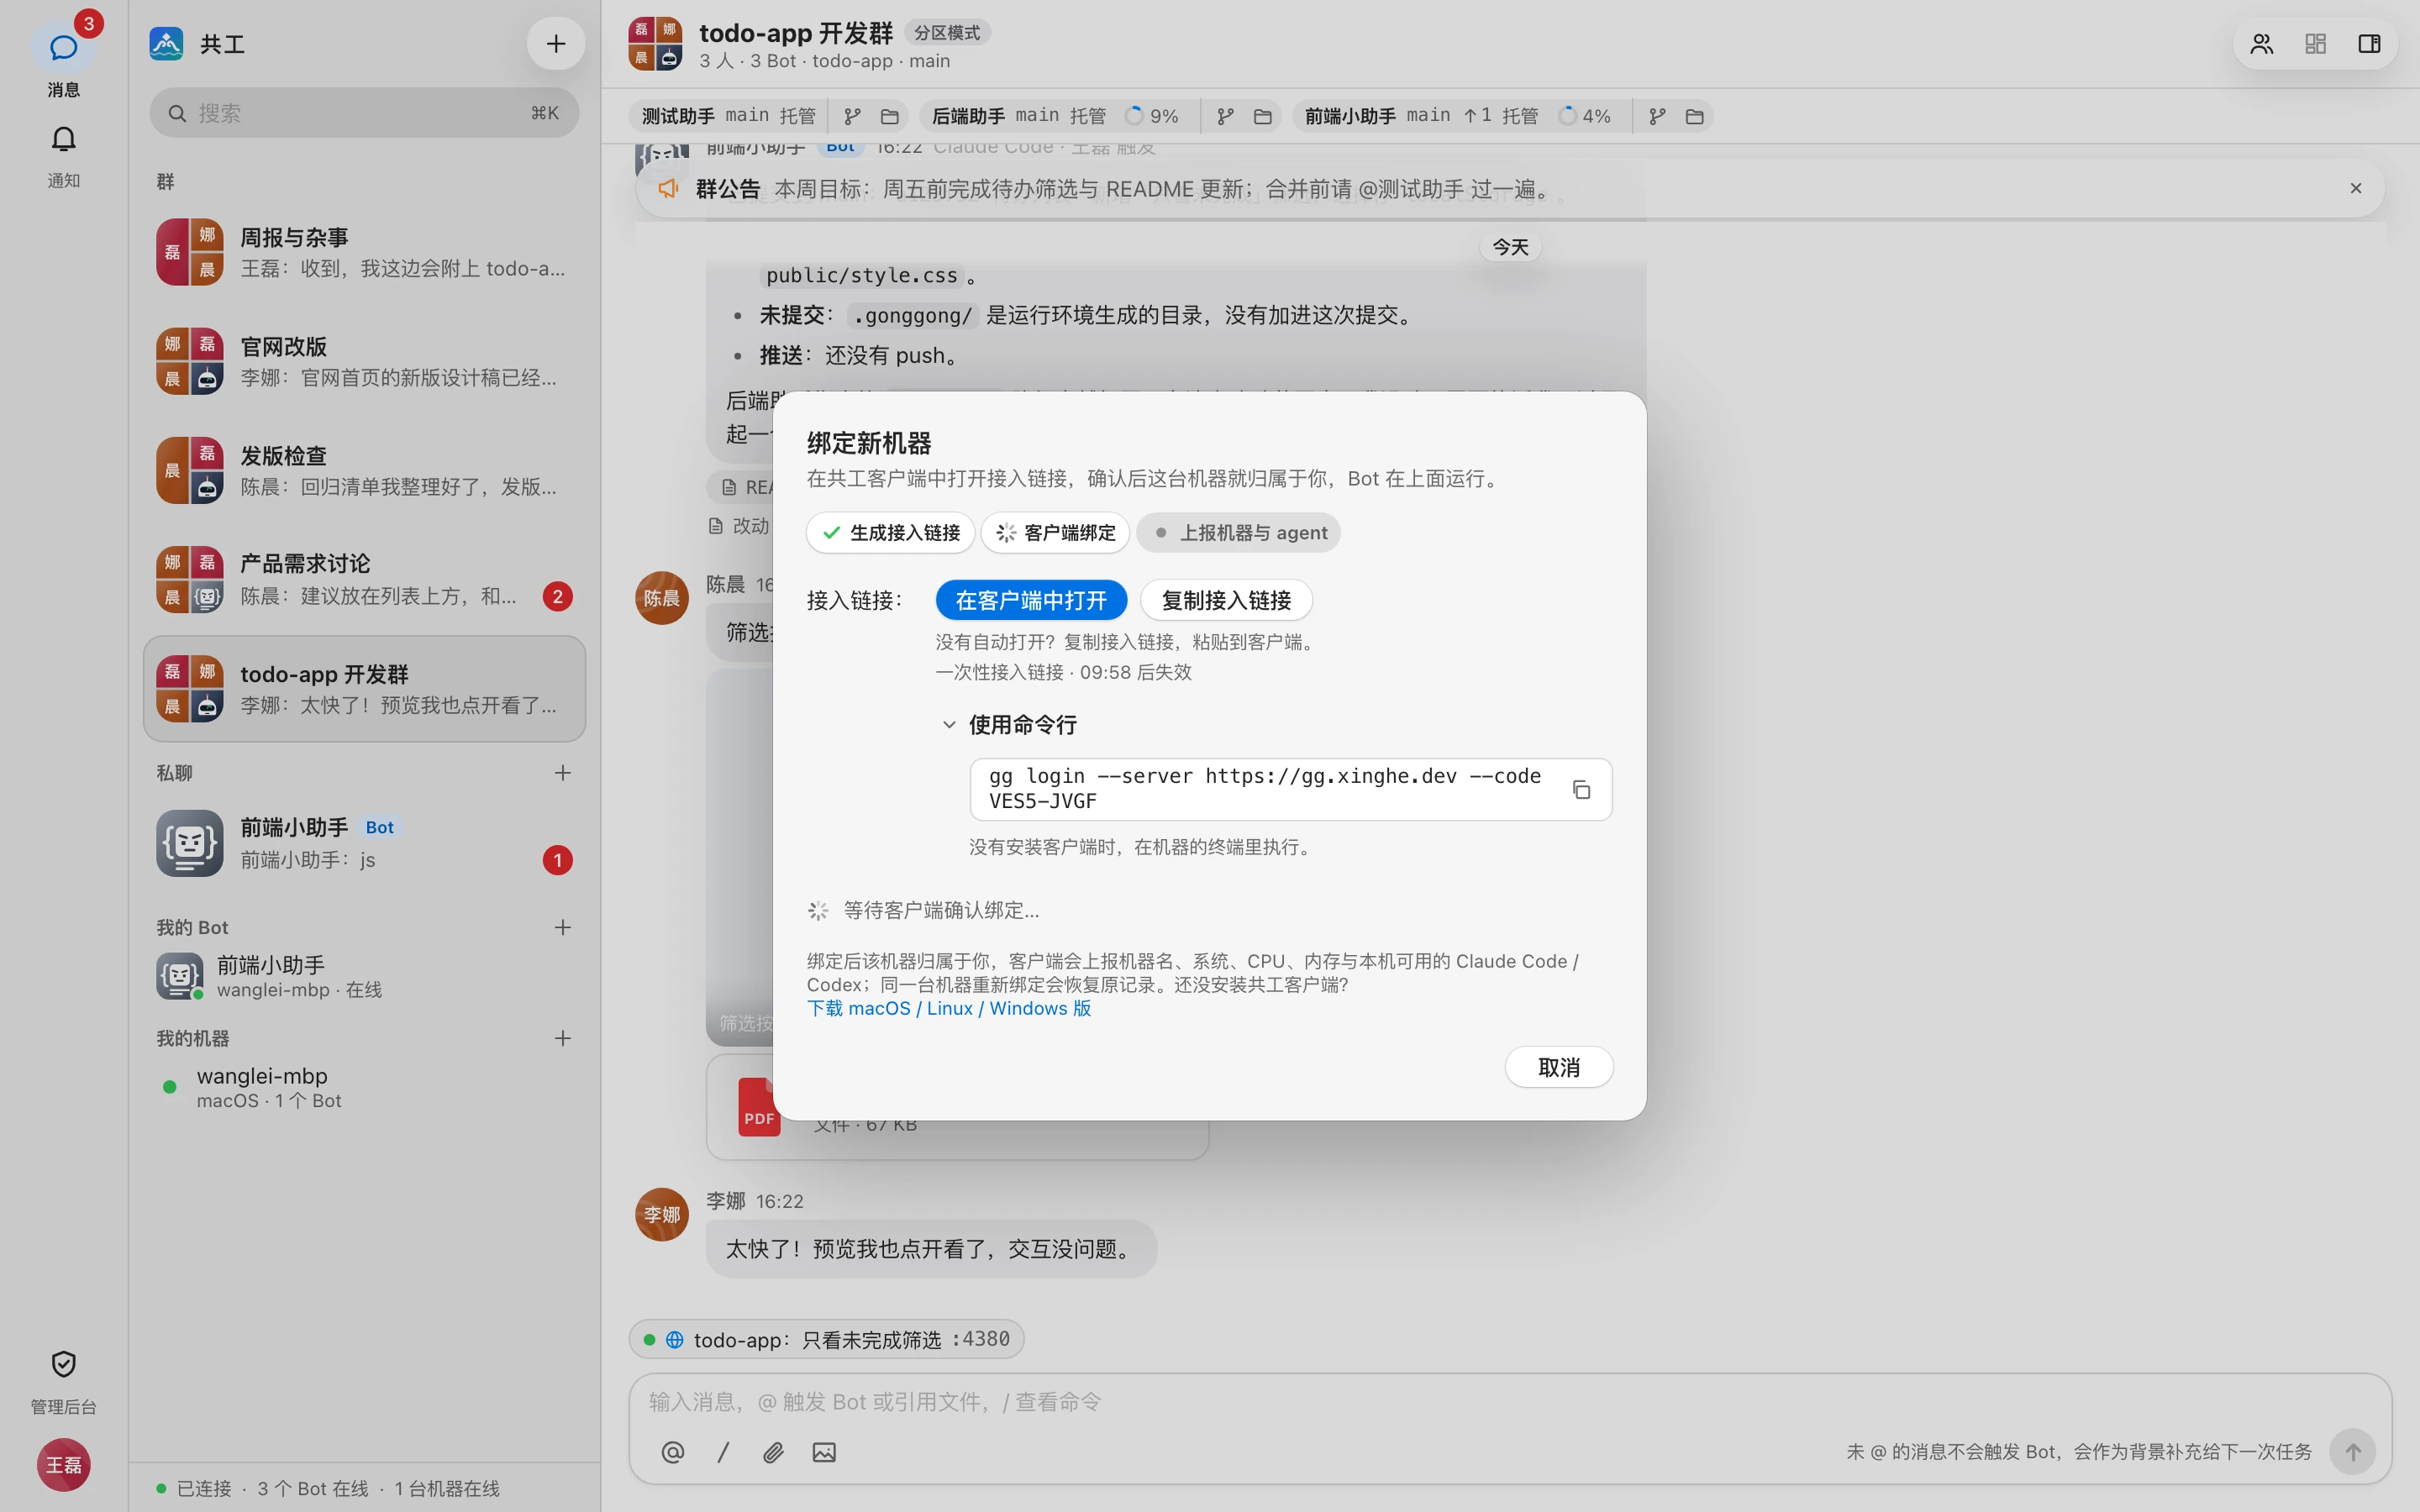
Once the dialog shows this machine's Claude Code / Codex versions, the machine is ready. See Bind a machine.
4. Create a Bot
- Click the + next to 「我的 Bot」 (My Bots) in the left sidebar (「新建 Bot…」 (New Bot…)).
- Choose the 「执行机器」 (Execution machine) (the one you just bound) and the 「Agent」 (Claude Code or Codex), and fill in the 「名称」 (Name), e.g.
后端助手(Backend Assistant). Optionally pick a 「角色」 (Character), and describe its responsibilities in 「系统提示词」 (System prompt), e.g. "Backend API development; only edit the server/ directory." - Click 「创建并绑定」 (Create and bind). When you see 「已就绪,可以在群里 @ 它了」 ("Ready—you can @ it in a group now"), you're done.
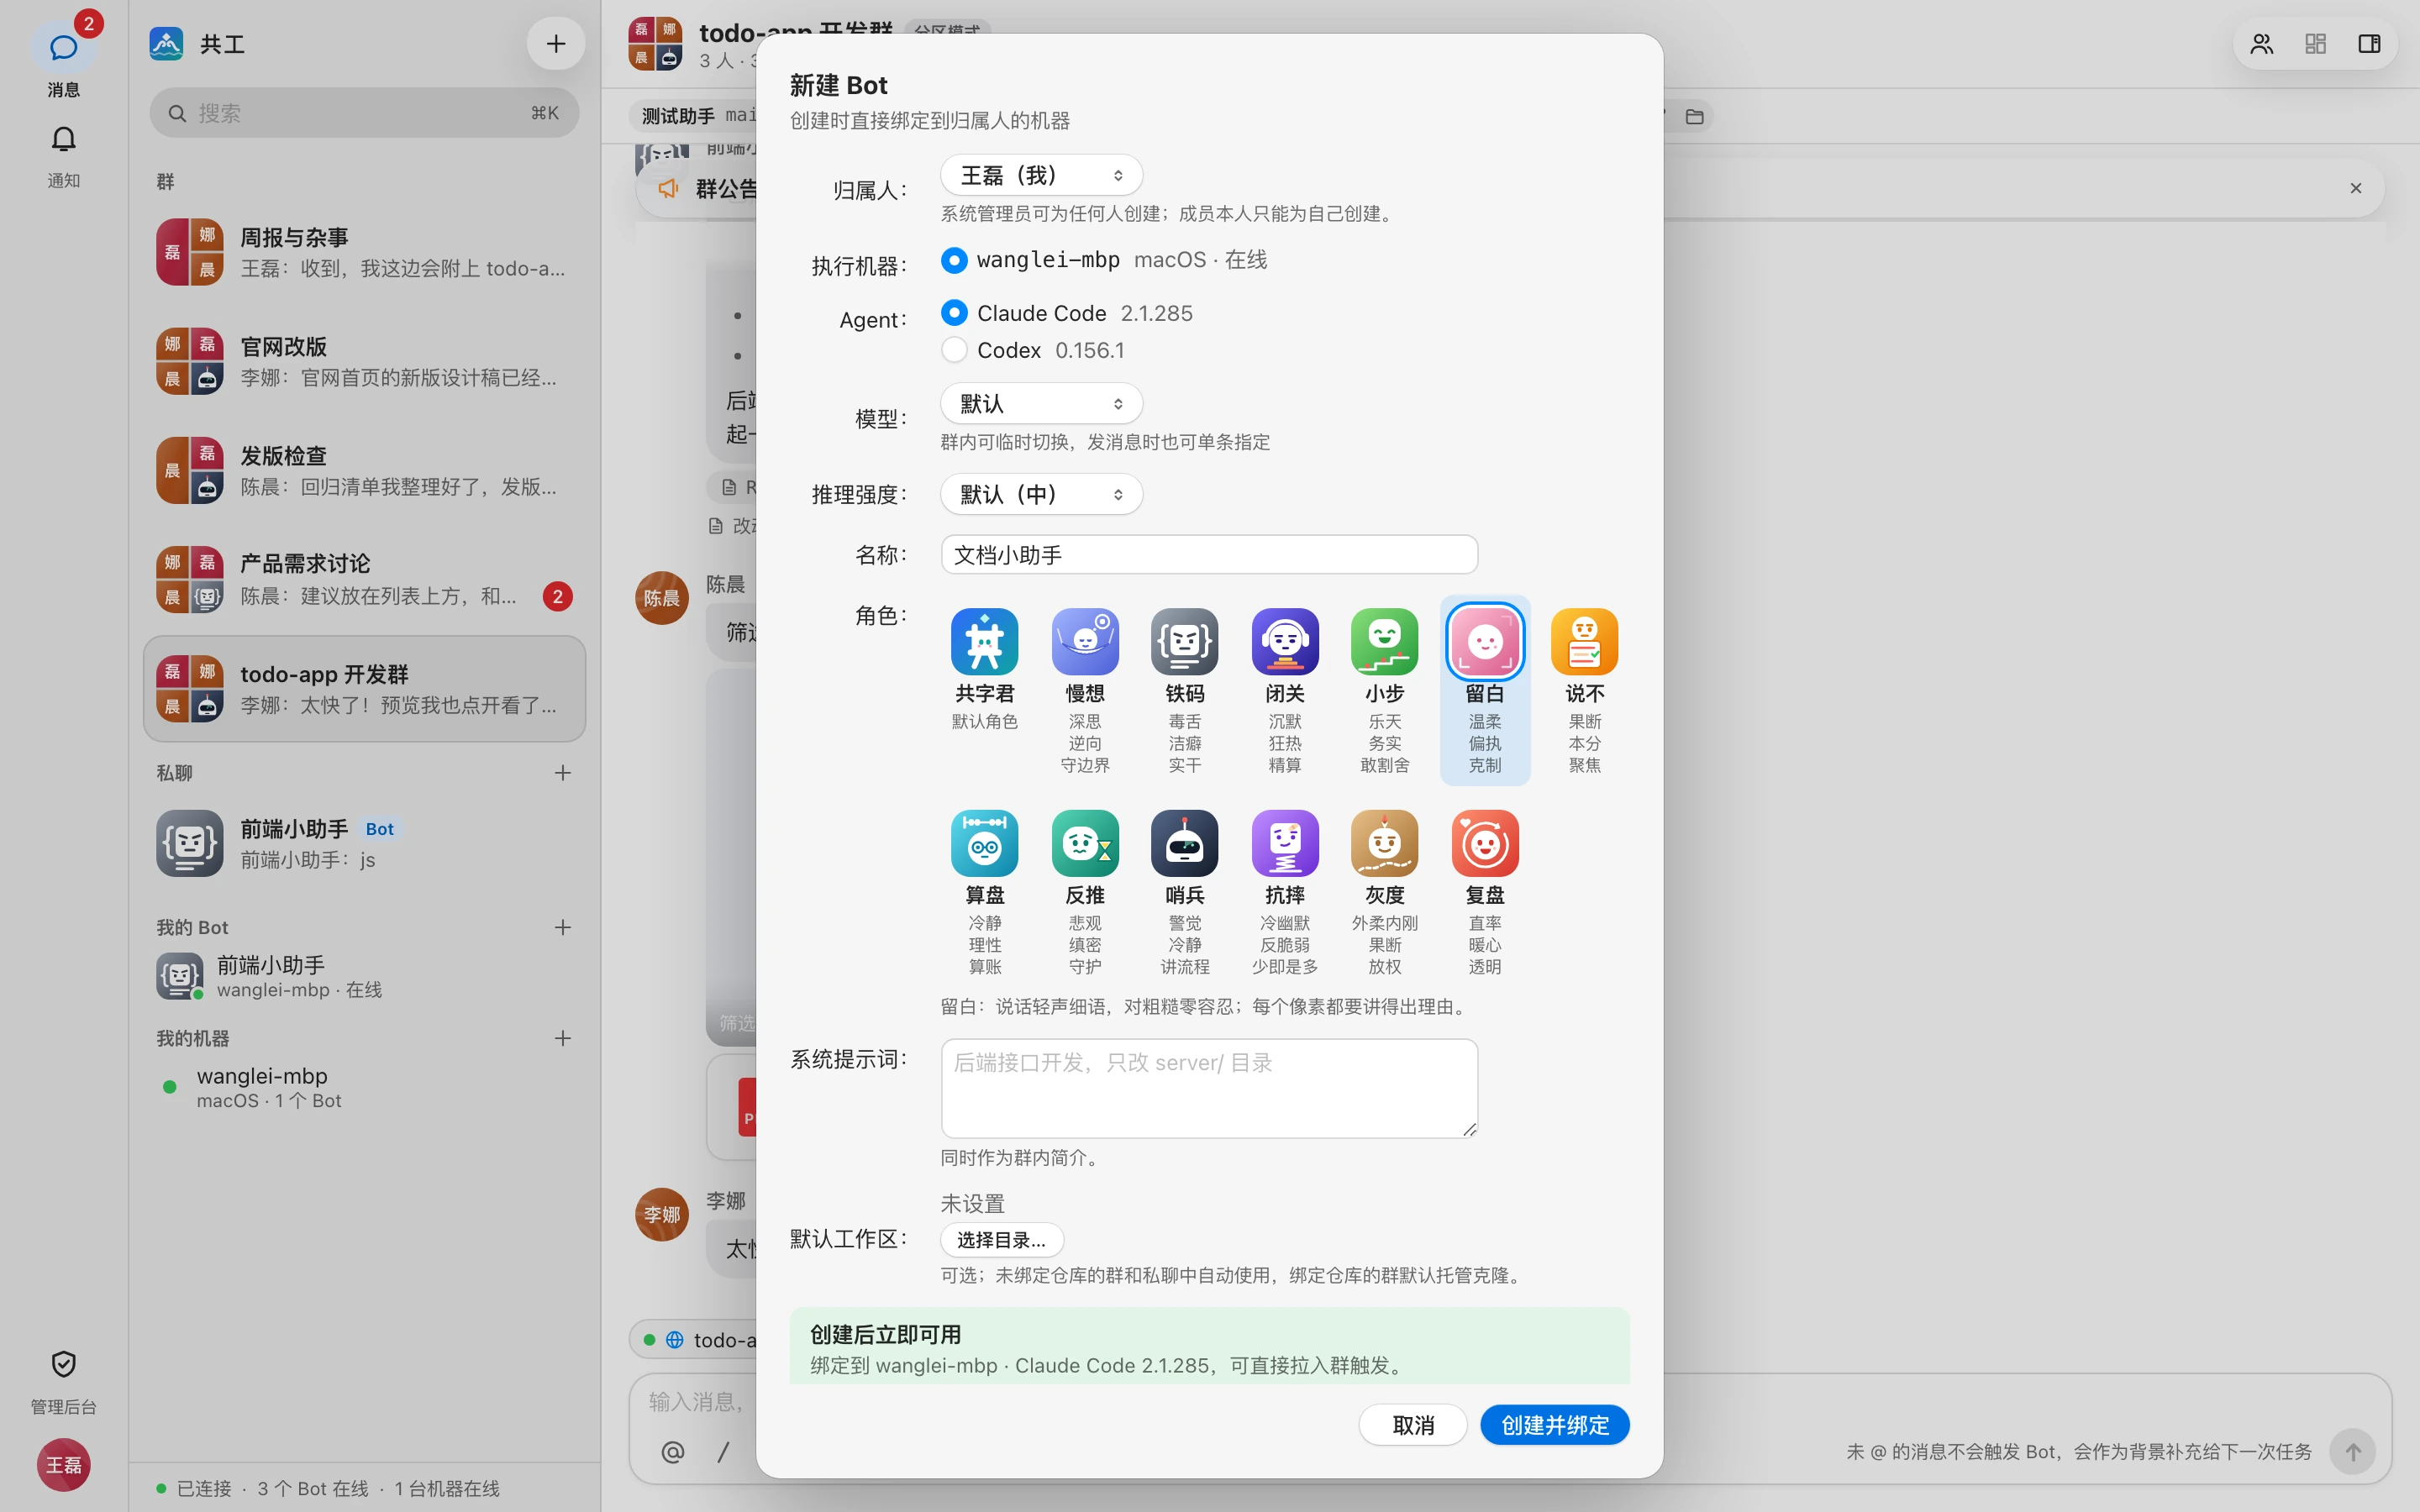
To start, we recommend setting 「触发范围」 (Trigger scope) to 「仅本人」 (Only me) in the Bot settings. See Create a Bot and Bot settings and permissions.
5. Create a group
- Click the + in the top toolbar (「新建群」 (New group)). If it's just for yourself, you can click the + next to 「私聊」 (Direct chats) in the left sidebar to start a direct chat.
- Fill in the 「名称」 (Name). To work on code, paste a git repository URL into 「仓库」 (Repository) (e.g.
git@github.com:xinghe/todo-app.git) and confirm the 「基准分支」 (Base branch). Add your Bot and your teammates. - Click 「创建」 (Create).
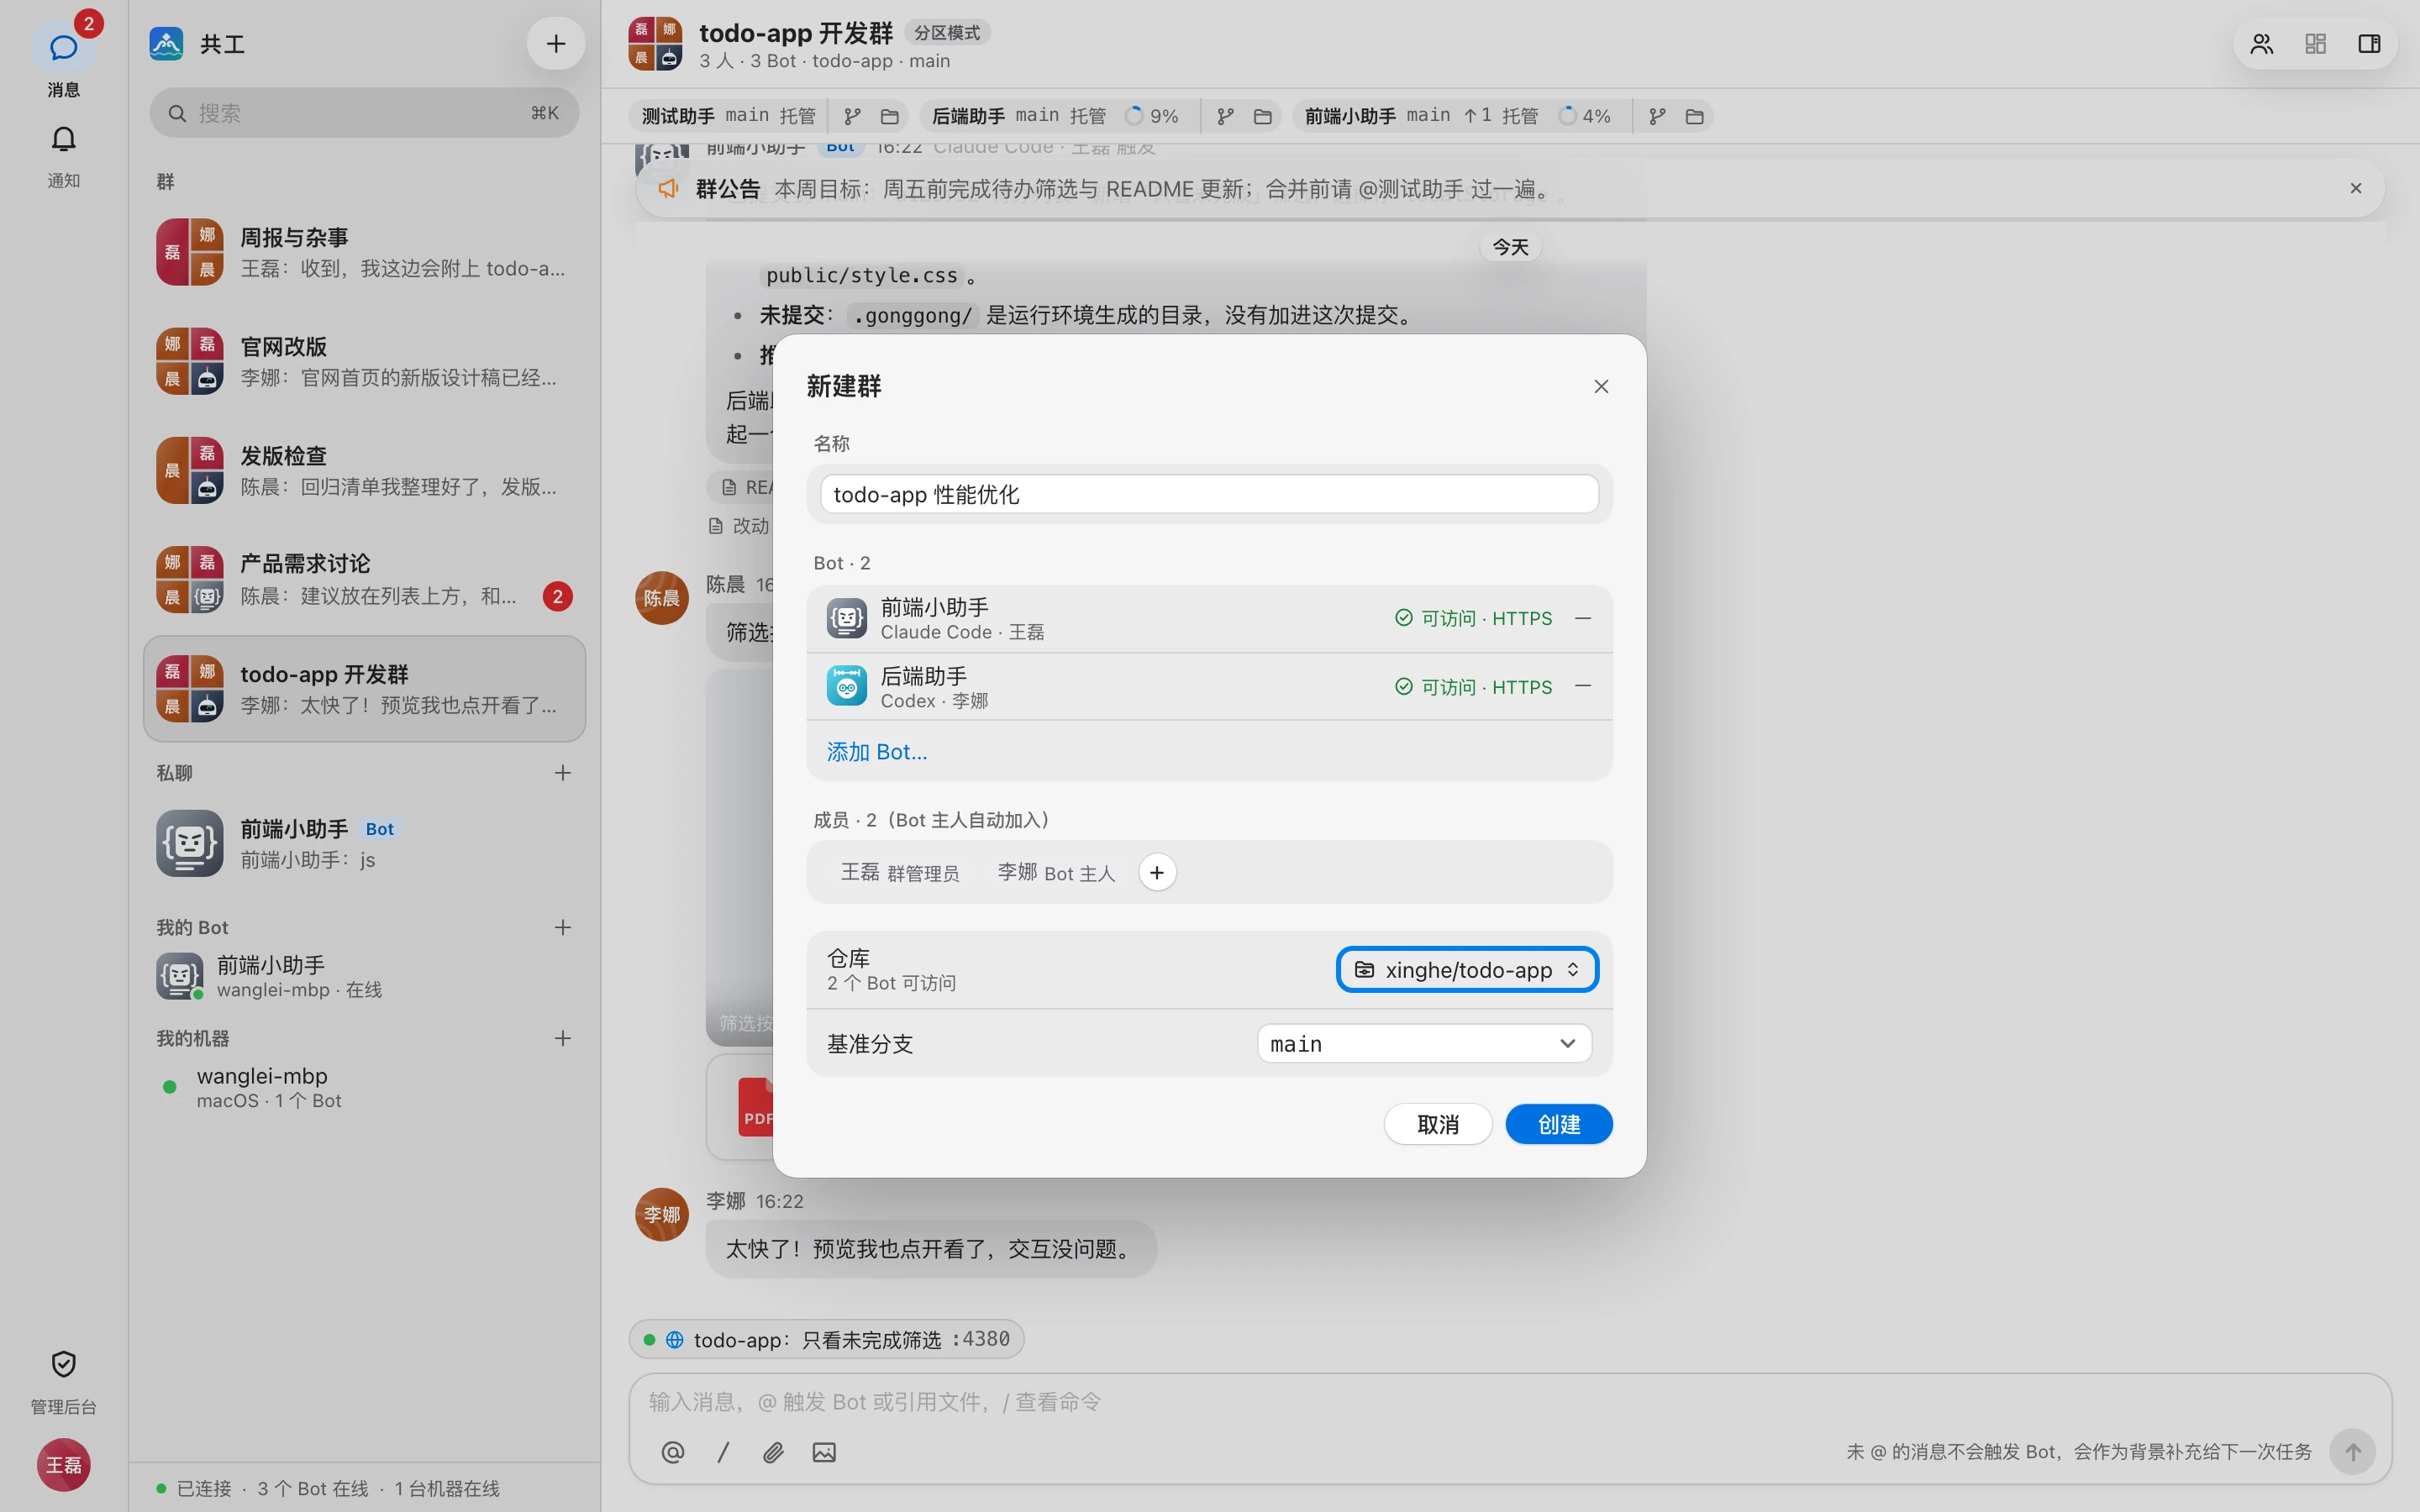
When the group is created, the server checks whether each Bot's machine can access the repository. A Bot that can't is paused after joining until its Bot owner configures git credentials and rechecks. See Groups and direct chats and Repositories and workspaces.
6. @ the Bot to get started
Type @ in the group's input box, pick the Bot, write your request, and press Enter:
@后端助手 看一下待办列表接口为什么偶尔 500,找到原因后修复并跑测试(That is: "@Backend Assistant find out why the todo list API occasionally returns 500, fix it, and run the tests.")
A run card appears in the group. Open it to see each step of its reasoning, tool calls, and command output, plus which code it changed; operations that need your approval pop up an approval card.
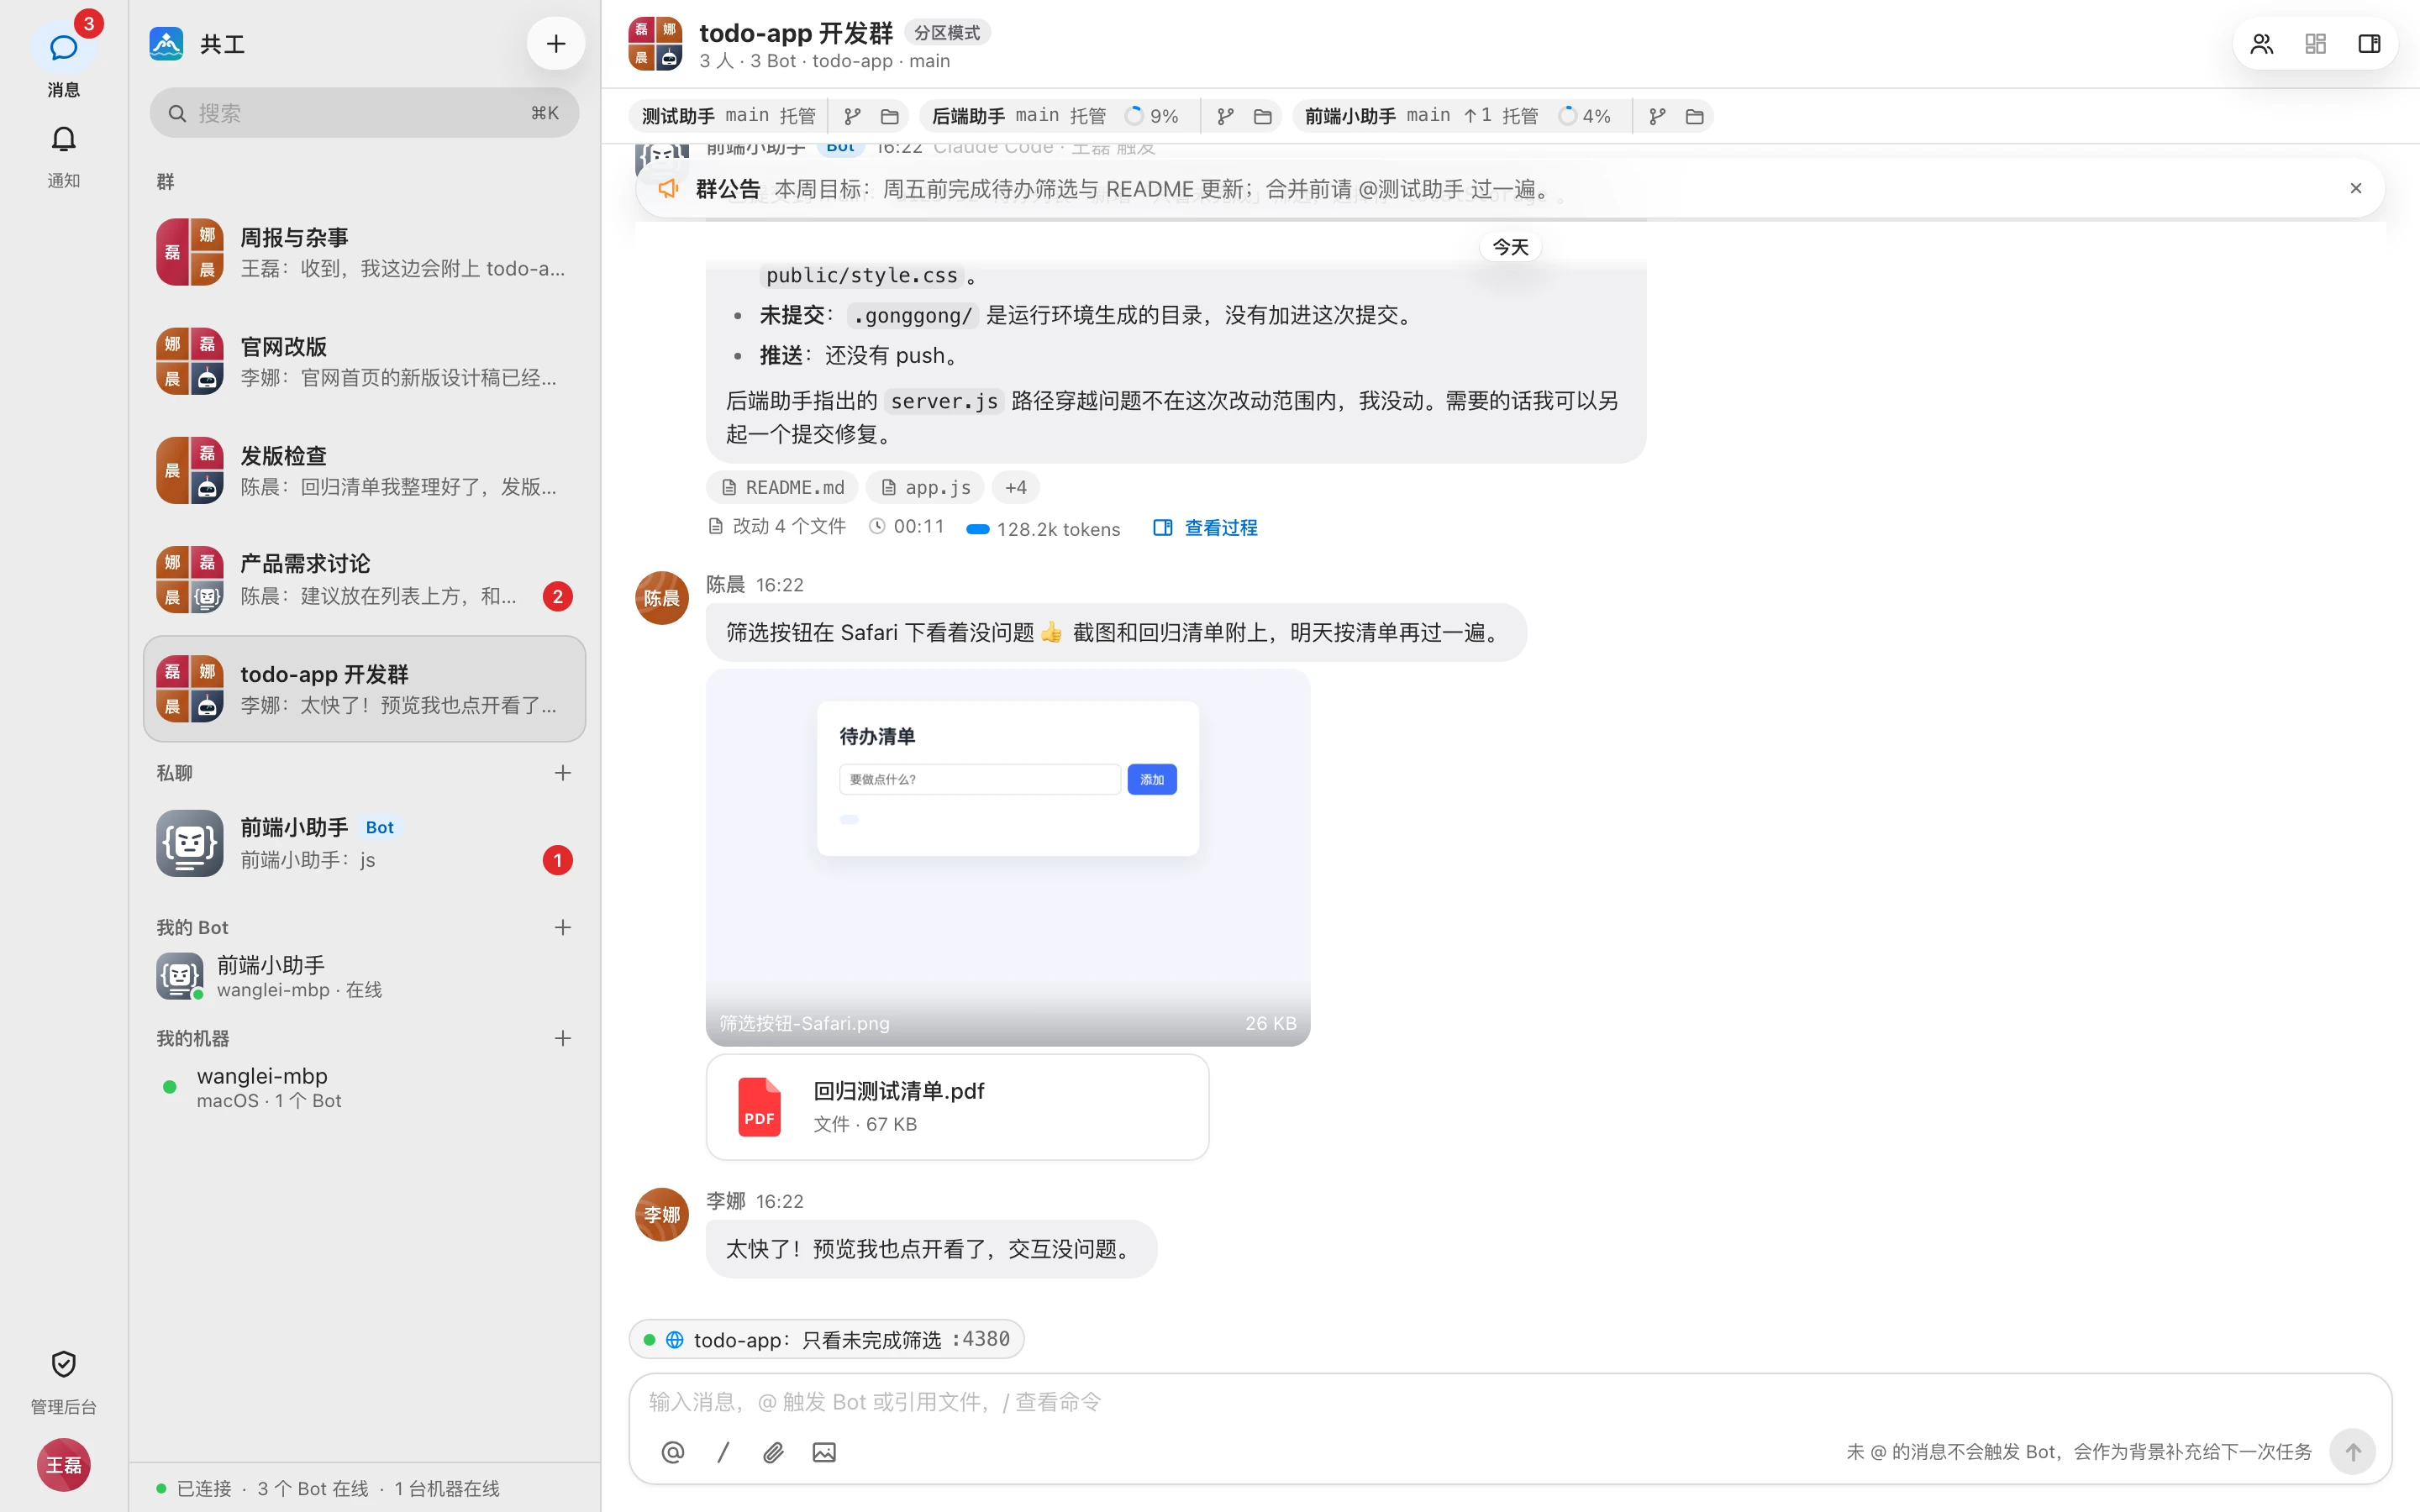
See Directing Bots in a group, Runs, and Approvals and questions.
Something went wrong?
First run gg doctor on the machine to self-check, then see FAQ and troubleshooting.